Tutorial 5 : Streaming Data - UDP Sending data over Wifi using UDP
If you have followed the previous tutorials your Termite should now be connected to the Internet. Now we want to send the data somewhere. There are several ways to do this. The Termite platform provides two methods, UDP and MQTT.
This tutorial will go through the necessary steps to setup UDP streaming.
Step 1 UDP Settings
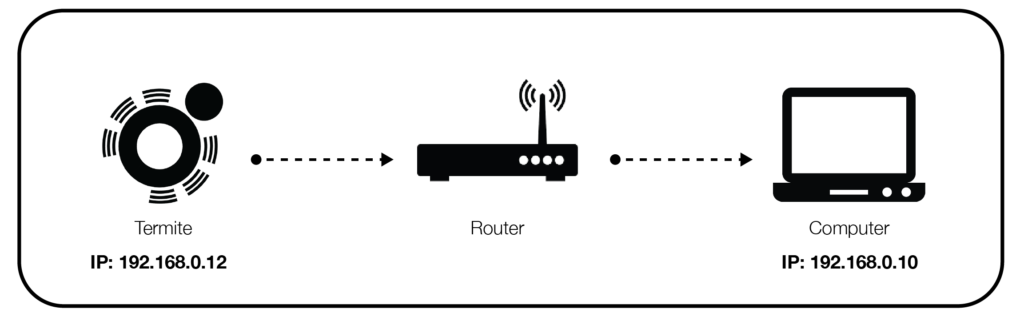
The Termite communicates with a “Wifi Network Router” and asks the router to send information to another computer with a specific IP address. The IP address tells the router where to send the data. In order for this to work you will need to know the exact IP address of the receiving computer.
Let get the IP address of your computer on the network.
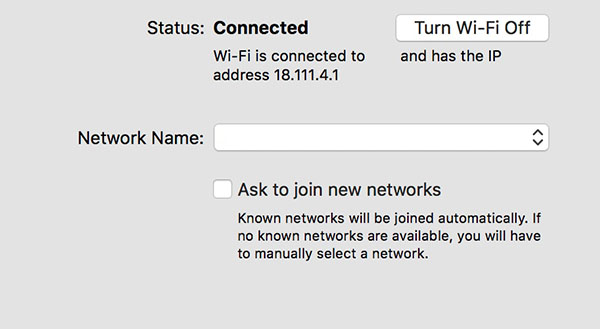
MacOS
- Make sure your computer is connected to the same Wifi network as the Termite.
- Go to your “System Preferences”
- Click on the “Network” icon
- Write down or copy the “IP address”
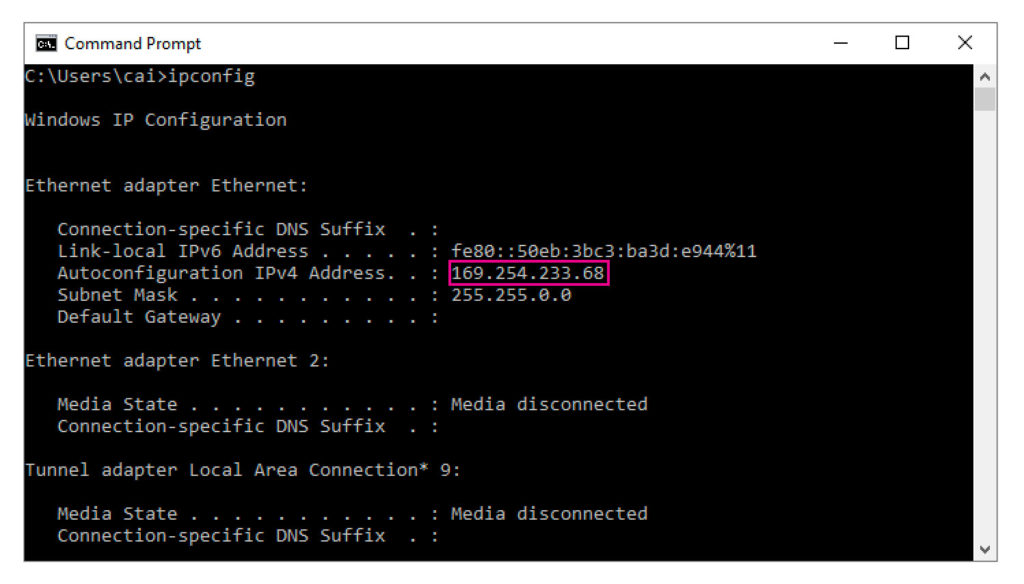
Windows
- Click the Start button. This will open the Start menu or screen.
- Type “cmd” and press. ↵ Enter to open the Command Prompt. …
- Type “ipconfig” and press ↵ Enter . …
- Find your active network adapter. …
- Write down or copy the “IP address”
Now that you have your computers IP address we are ready to update the Termites Settings.
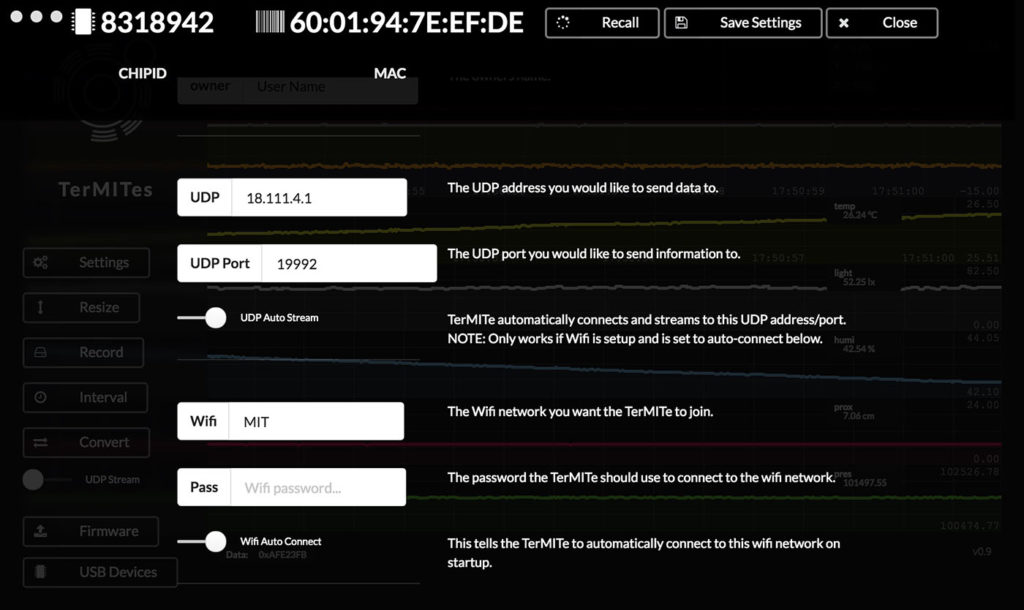
Click “Settings”
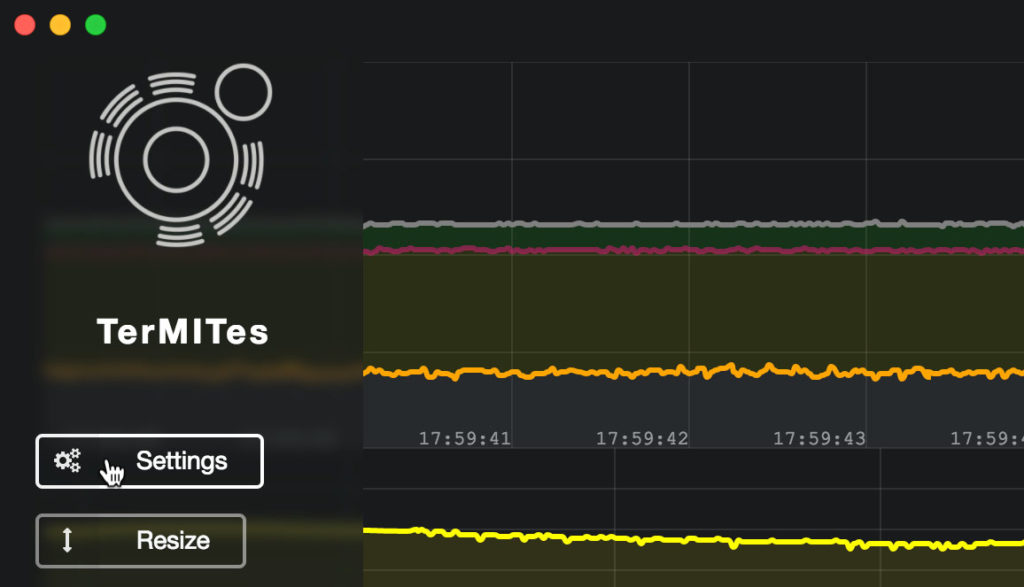
There are only two values that are required for a successful UDP connection, an IP address and a Port number. Go ahead and enter your settings
- Enter the UDP ip address
- You can leave the UDP Port for now
- Enable UDP Auto Stream
- Click “Save Settings”
Step 2 Receiving Data
Let do a very quick test to make sure that the data is coming through. UDP data can be received many ways. A quick way to check if we are receiving data is to use a simple Python script. If you don’t know anything about Python not to worry. Lets go through the steps.
- Download the Python script: Termite_UDP_Receiver.zip
- Open up the Terminal program on your computer and follow the instructions for your operating system (Mac/Windows).
MacOs
- The Mac Terminal can be found in /Applications/Utilities/Terminal.app
- In the terminal window type “python” (Do not hit enter)
- Drag the Python script you download onto the Terminal window.
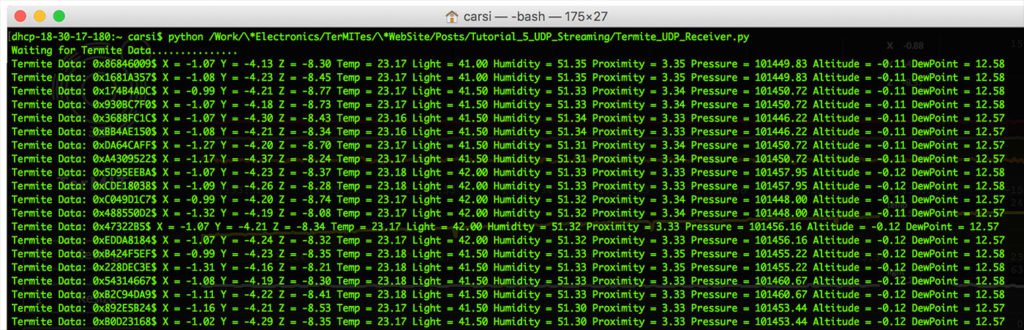
- You should now see something like this in your terminal:
“python /Users/UserName/Downloads/Termite_UDP_Receiver.py”
- Hit enter
- You should see a line that says “Waiting for Termite Data…..” and data should start flowing into the terminal window.
Windows
Windows is a little more tricky. Unlike MacOS, it does not come with Python installed. You may need to install Python if you are using a windows machine. Python for Windows can be found here:
https://www.python.org/downloads/windows/
Once you are certain that Python is installed, you can continue with these instructions:
- Click the Start button. This will open the Start menu or screen.
- Type “cmd” and press. ↵ Enter to open the Command Prompt.…
- When the command prompt window pops up type the following (Do not hit enter).
“C:\Python27\python.exe”
- Drag the python script you downloaded onto the command prompt window.
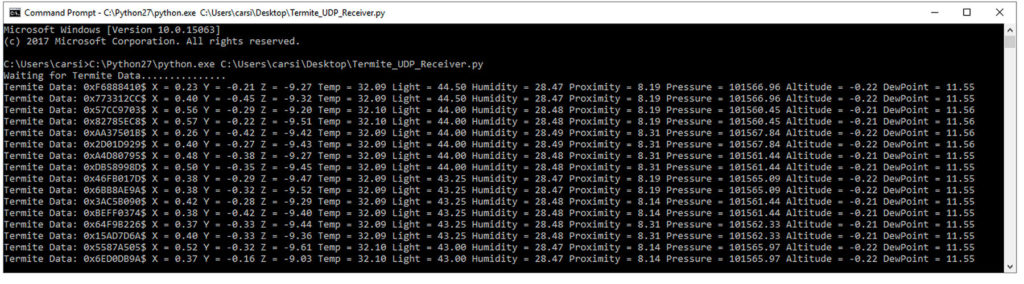
- You should now have a string (sentence) that looks like this:
“C:\Python27\python.exe C:\Users\carsi\Desktop\Termite_UDP_Receiver.py”
- Hit Enter
- You should see a line that says “Waiting for Termite Data…..” and data should start flowing into the terminal window.
Congradulations
The drawback of UDP is that you don’t always know what the IP address of the receiving computer will be. In order to avoid this weak link in the chain the Termite can send data to a server. The servers IP address never changes and so we do not have to worry about the chain breaking.
Tutorial 6 – Sending Data to Servers